
Server Setup Log 2
Intro

↪ Last time setup was more like infrastructural settings and SSH security settings, what you’re going to watch this time is something closer to the service. These are things that I’ve never done before in my life, so I was able to work with excitement throughout the process. I’m really looking forward to it!
Be prepared with Docker
Docker
![]()
↪ Docker was the technology chosen to use various services on the server. While using container technology to conveniently use services to suit my taste, I prioritized technology with a wealth of references. OSs such as Proxmox and Henology, which are often seen in various communities such as reddit and server forums, were also a concern.
The reason why we chose Ubuntu and Docker environments is because
- Reference size
- Existence of images planned to serve
That was about it.
In the case of Proxmox, the advantage of having a strong backup or a variety of OSs came as a charm, but at the same time, I felt it as total overkill and had a burden on new research. So I set up a Ubuntu + Docker server.
In the case of docker installation, I don’t want to record it separately here because the official document is so well written.
After installing the above document for reference as it is, the docker cli is being used through the ‘sudo’ command without giving permission to the user account separately.
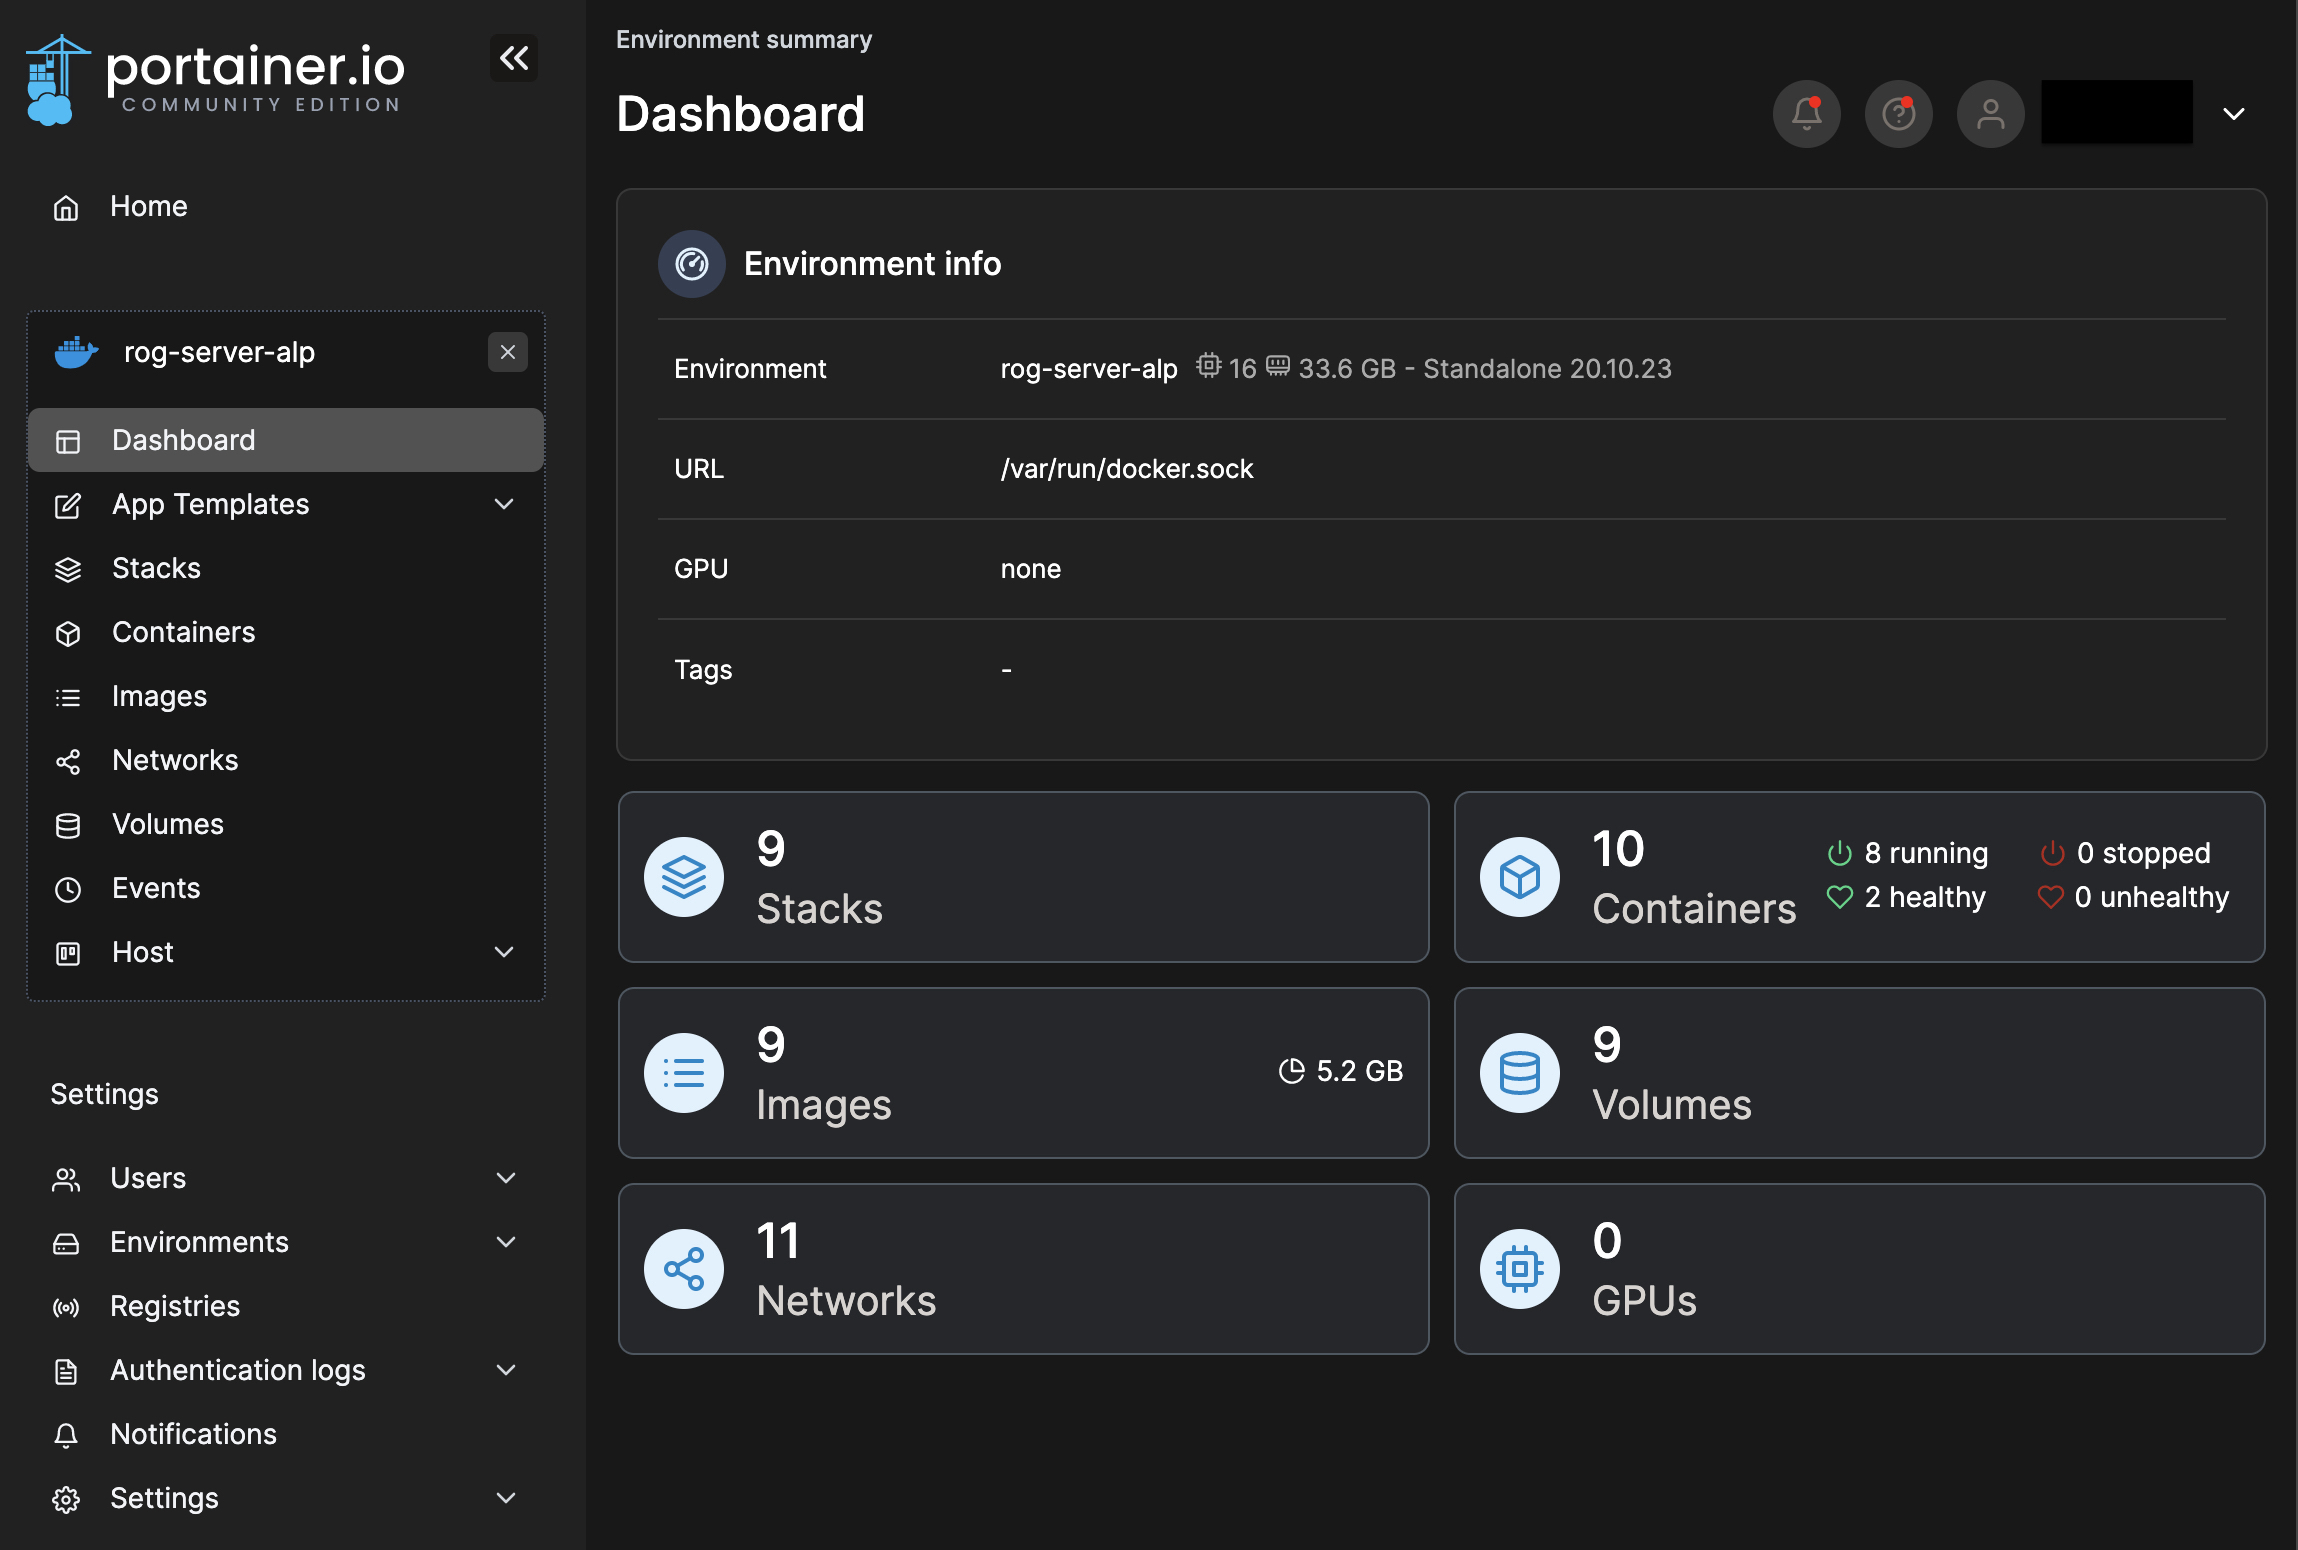
Portainer
![]()
↪ The first container I set up is the Portainer. For me, as I store all the containers in repository, it is much easier to manage them with stacks in Portainer than with docker cli.
version: "3.8"

services:
  portainer:
    image: portainer/portainer-ce
    container_name: portainer
    restart: unless-stopped
    ports:
      - ${PORTAINER_PORT}:9000
    volumes:
      - /etc/localtime:/etc/localtime:ro
      - /var/run/docker.sock:/var/run/docker.sock:ro
      - data:/data

volumes:
  data:
Vola!
Nginx Proxy Manager
![]()
↪ I started the home lab with the intention of lighting up on various services to containers and accessing through subdomains, so I set up the NPM (Nginx Proxy Manager) container to manage the reverse proxy conveniently on the GUI.
I chose NPM because I can conveniently set up SSL as well as reverse proxy, and after using it for a short period of time, I think the selection was effective.
I’ve got sooo many help from dalso of server forum.
Network
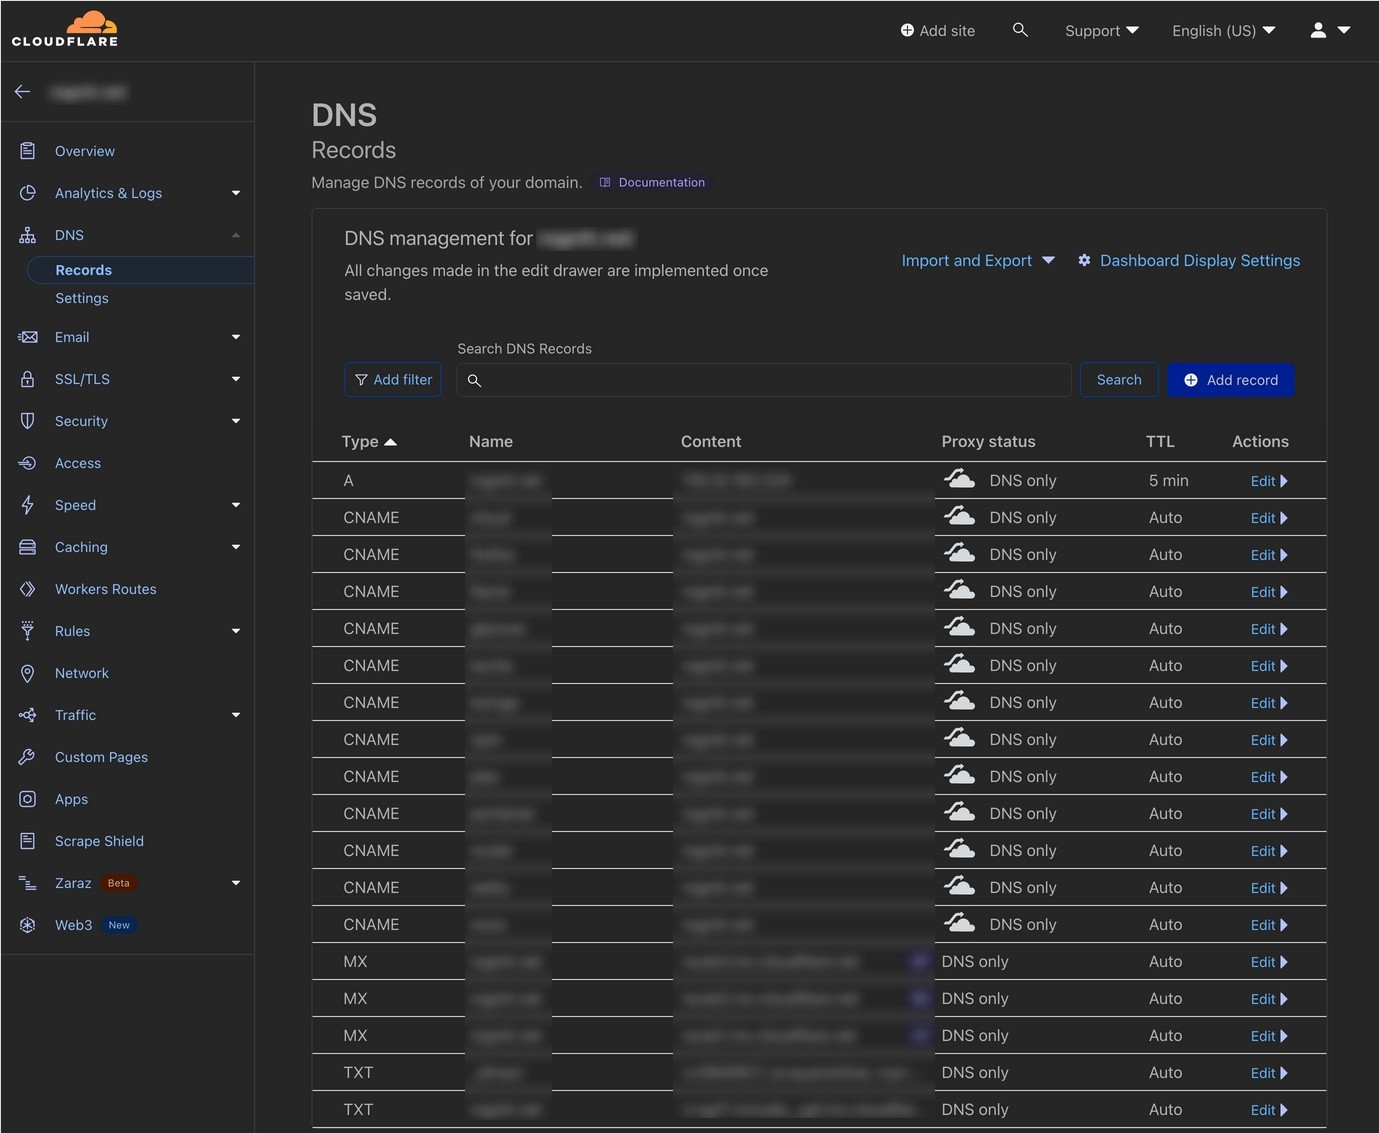
Domain & DNS
![]()
↪ While considering buying a domain, I actually used Google domain at first. I trusted Google’s name value too much… I made that decision, but when I set up the SSL wildcard certificate, I immediately regretted it.
On Let’s Encrypt wildcard SSL certificate on NPM, the process of authenticating through API tokens is essential, but Google Domain did not provide API tokens…

Eventually, I switched to Cloudflare in the process, but it happened to be five days after I bought the domain, so Google Domain didn’t give me a refund. If anyone watching this wants to use the wildcard SSL certificate, I recommend you to select (…) Cloudflare.
DDNS
# install ddclient
$ sudo apt-get install ddclient
# stop daemon
$ sudo /etc/init.d/ddclient stop

# edit your configuration file
# /etc/ddclient.conf

# start daemon
$ sudo /etc/init.d/ddclient start
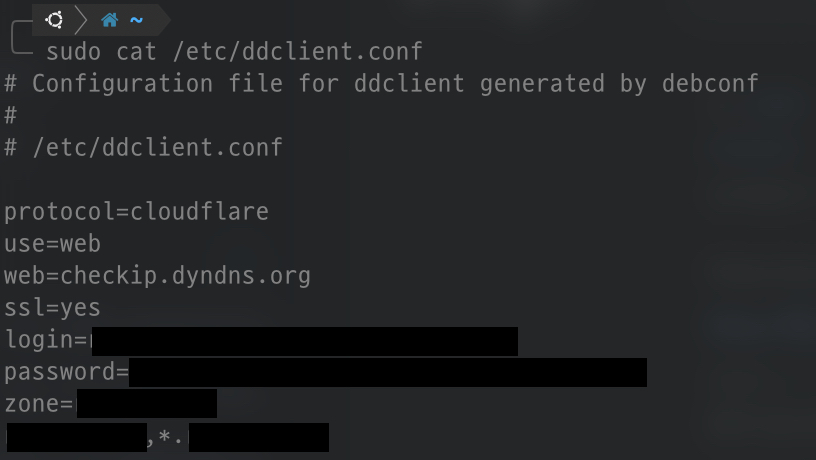
↪ Most individuals’ home lab environments will not be in the form of fixed ip provided by ISPs. Therefore, even if it is a dynamic ip, if the ip changes in a situation where the server cannot be handled directly, nothing else will be in your hands until you go home.
That’s why DDNS settings are needed, but I chose ddclient. It’s the simplest way to choose, and you can install the service as above, set the appropriate settings in the settings file, and run the service.
We will now schedule the ddclient service to run when you reboot the following through crontab.
# edit crontab list
$ sudo crantab -e

# add this line bottom
# @reboot root ddclient -daemon 1800 -syslog
SSL
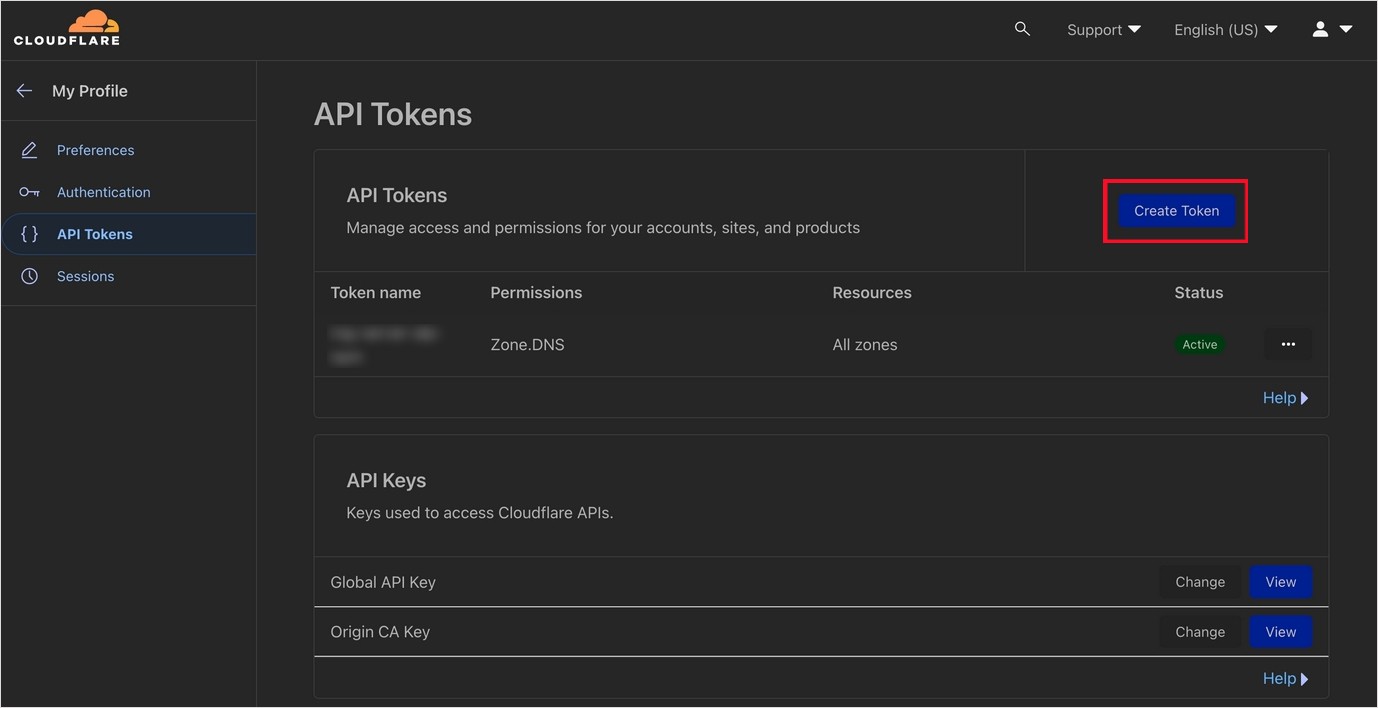
↪ SSL certificates are simple, too. Nginx Proxy Manager is really convenient. You have to get API tokens for SSL wildcard certificates from Cloudflare.
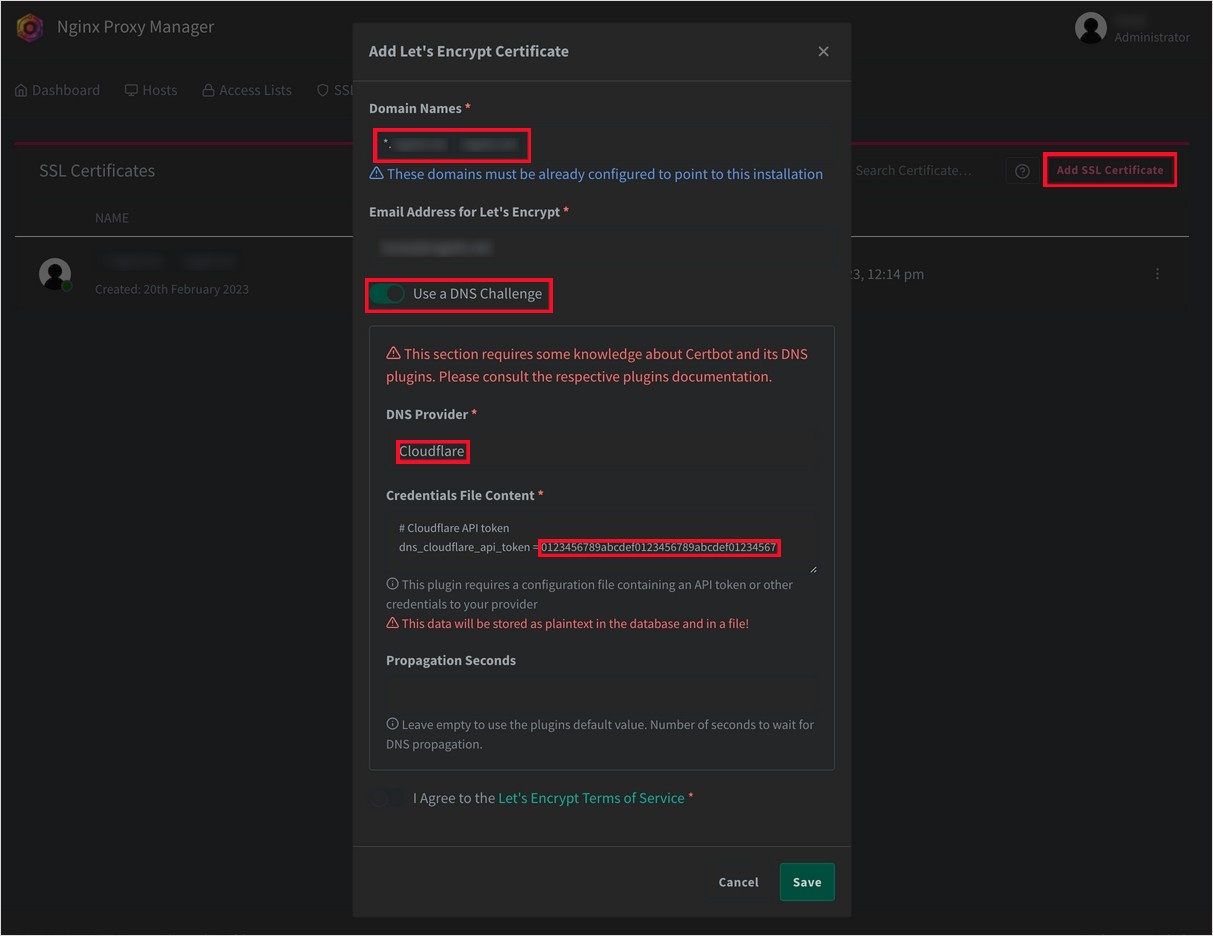
↪ You can now get SSL on the NPM. I recommend that you write both ‘*.domainname.com ‘ for the wildcard certificate and ‘domainname.com ‘ for redirection on the main domain in the domain name to which you want SSL to apply. (I recommend to write both in the settings in the ddclient.)
The API token that I just copied was to write right here. Now, just press Save and wait.
Reverse Proxy
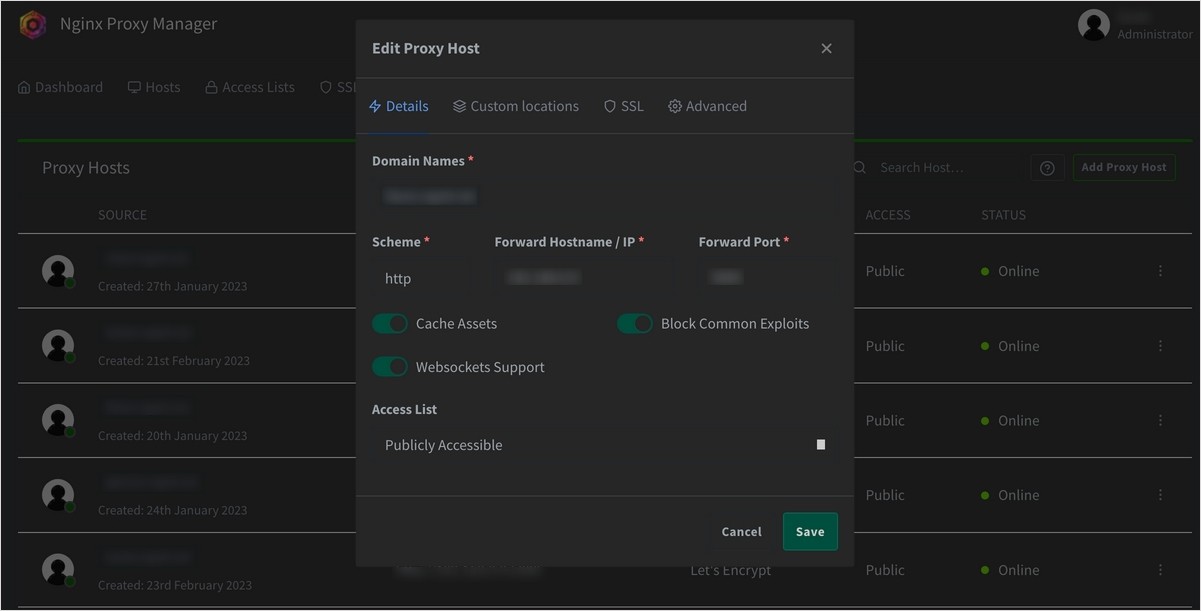
↪ Now map the services started through Docker to the sub-domain and done! In ‘Domain Names’, write down the sub-domain URL registered in Cloudflare, and in ‘Schema’, ‘Forward Hostname/IP’, and ‘Forward Port’, you can specify the path of the service to be viewed from the perspective of NPM.
In my case, since these services are currently running on the same host, I set them to be accessed through the internal IP of the server, which is the host of NPM. For each service, you can write down the host port mapped to the internal port of the container.
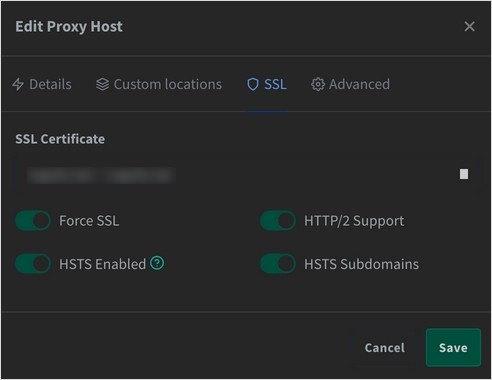
I only had to select the certificate that had been got for SSL right away. The following options are set according to the situation.
- ‘Force SSL’: Forces all traffic to be redirected using the HTTPS protocol; prevents man-in-the-middle attacks.
- ‘HTTP/2 Support’: Enable HTTP/2 version to gain performance benefits.
- ‘HSTS Enabled’: HTTP Strict Transport Security (HSTS) is an option that forces access to HTTPS protocol only. SSL stripping attacks can be prevented.
- ‘HSTS Subdomains’: HSTS options apply to both subdomains as well as the main domain.
Prevent being POTATO
Suspend

↪ After setting up the server for the first time, there were frequent disconnections at remote locations for a few days. I searched for a long time for what the problem was, even though the server didn’t crash or turn off the power. The bottom line was that I just went to standby mode because there was no input for a certain period of time. No, it’s Ubuntu ‘Server’, but standby mode is the default…
# check status
# Loaded: loaded
$ sudo systemctl status sleep.target suspend.target hibernate.target hybrid-sleep.target
# disable suspend
$ sudo systemctl mask sleep.target suspend.target hibernate.target hybrid-sleep.target
# check status again
# Loaded: masked
$ sudo systemctl status sleep.target suspend.target hibernate.target hybrid-sleep.target
The above command prevents you from entering standby mode and reboots it. Since then, I haven’t been in standby mode and I’ve been using idle state well.
Soft Lockup
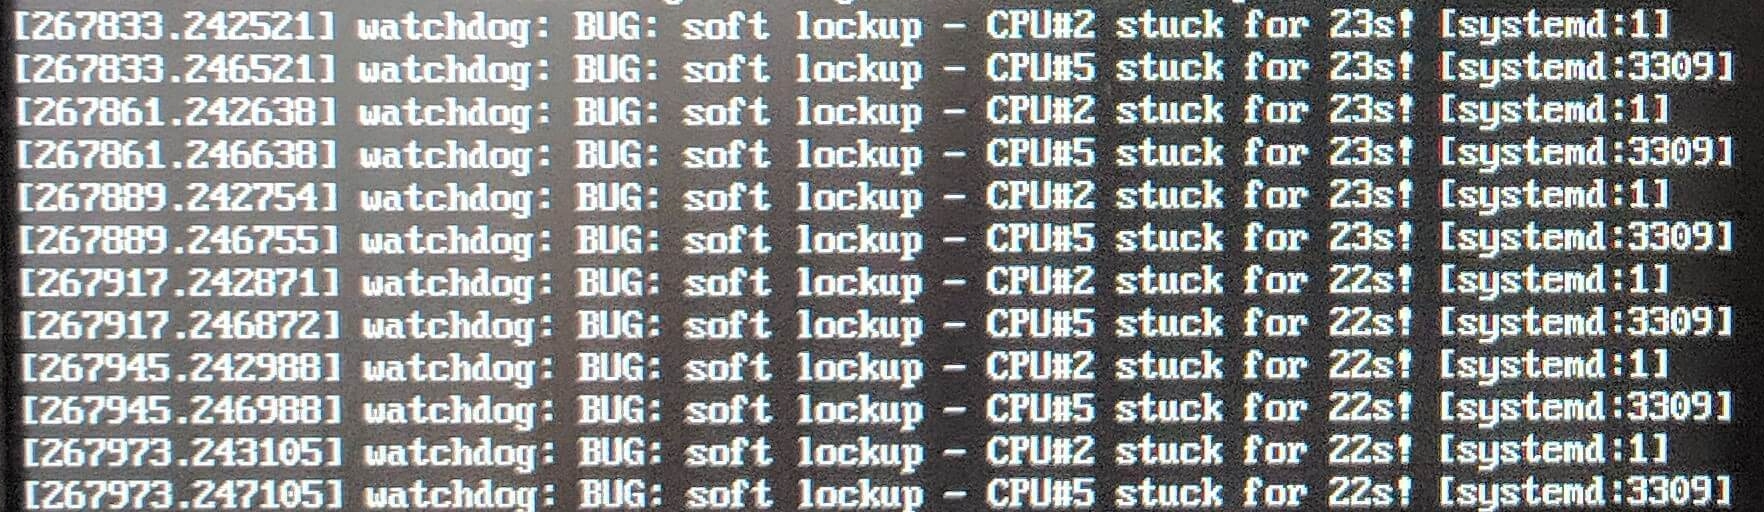
↪ While I was running a happy server again… Suddenly, there was no response from the server. This time, I had a very long time of patience and came back home to search again and again. The log I uploaded from the server was filled with kernel:NMI watchdog: BUG: soft lockup - CPU#3 stack for 1332s!.
As a result of the search, the most suspicious item was the collision between the graphic card and the nouveau driver with the Ubuntu OS built-in. So I disabled the nouveau driver and installed the nuvidia driver. In fact, it is an error caused by this cause, so we will have to wait and see if the next treatment will work.
# update & upgrade before install
$ sudo apt update && sudo apt upgrade -y
# install nvidia-driver
$ sudo apt install -y ubuntu-drivers-common
# check nvidia driver list
$ ubuntu-drivers devices
I installed the nvidia-driver and checked the list of drivers that could be installed. Among them, I installed the driver with recommended.
# install recommended driver
$ sudo apt-get install nvidia-driver-525
Not as my concerns, the installation took some time, but there was no issue. Now, we had to deactivate the existing working nouveau driver.
# make a new blacklist to disable the driver
# paste these two lines to the conf file
#
# blacklist nouveau
# options nouveau modeset=0
$ sudo vim /etc/modprobe.d/blacklist-nouveau.conf
# apply configuration
$ sudo update-initramfs -u
# reboot
$ sudo reboot

# check graphic driver installed
$ nvidia-smi
It was concluded that the issue was due to aging multi-taps at the end of June 2023…
Epilogue
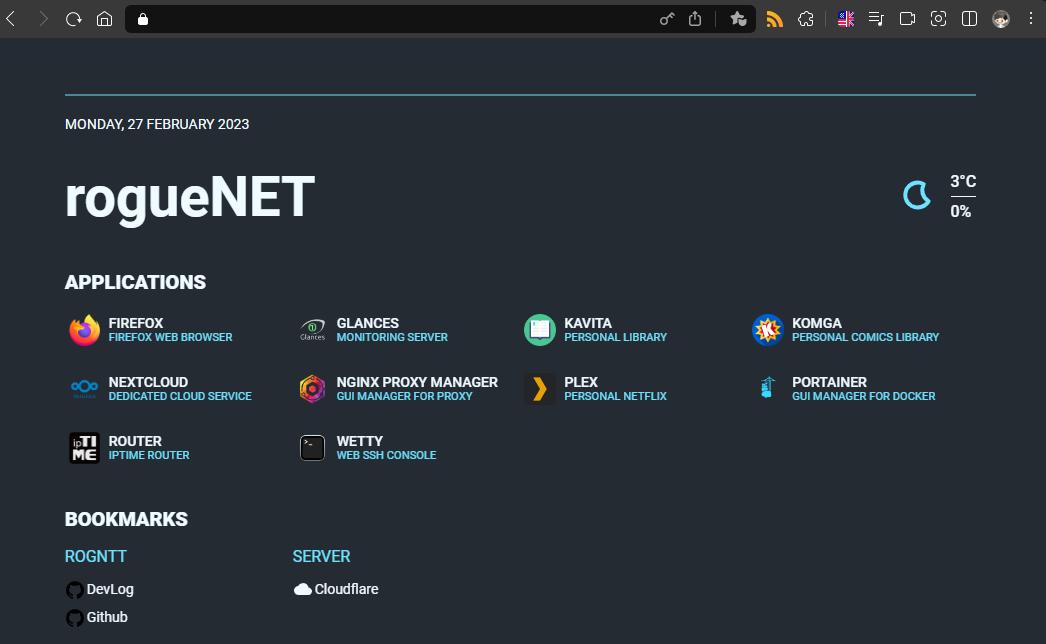

↪ There are several services to make comfy server remote management, and there are services to be used as media servers, and although you can’t see it on the server dashboard above, it’s also being used as a Dedicated Game Server. Of course, it is also being used as a DB server, CICD server, or image server for toy Project.
In the future, I will continue to use server management services such as autelia and services that are good to use on servers such as qbitorrent, tandoor, piwigo, and wireguard in containers as soon as we are interested.
Maybe someday I could use equipment such as server racks and switches that we see in Reddit and Server Forum.


댓글남기기