Server Setup Log 1
Intro

↪ While building a new Windows Gaming PC, I built the server with leftover parts. My heart was pounding at the thought of building up home lab instead of GCP, AWS, and WSL. From the router setup, I will leave traces of my first home lab.
Things I had to decide
Operating System

↪ The first thing I thought about was deciding on the OS. I wanted research to be the most convenient and thought about versatility for home servers, so I thought about using Ubuntu the most. Of course, I was also thinking about OS such as Proxmox. However, stability issues were often seen in various communities and forums, so the final decision was decided to use Ubuntu.
As for the OS version, I thought a lot about whether to use the version that guarantees stability or the latest version. However, it doesn’t seem to be a big problem right now, so I chose the latest version. (Well, there is a problem with the GLIBC version when building the docker in the Jenkin image uploaded as Docker during the CI/CD setting of the ongoing toy project, so it seems that further adjustments are needed.)
Network
Home Network
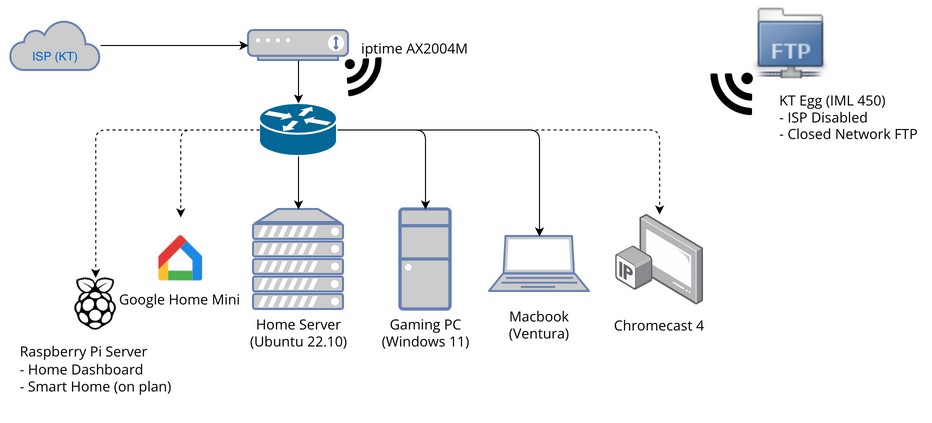
↪ In fact, I only have a single network in my room. It’s become a very simple home network because I don’t have a lot of equipment and I don’t have any particular reason to configure switch equipment or VLANs.
The hardest and most difficult part of server setup and network configuration was physically setting up the ISP’s optical LAN hypothesis, from servers and PC buildings to cable ties, Velcro, and multi-taps. There were some really fun things to do, like go under a small desk and work on a pegboard about 10cm apart between the back and the wall, or go up and down with the ISP staff due to the structure of the house I live in now when installing the ISP’s optical LAN.
Port Forward
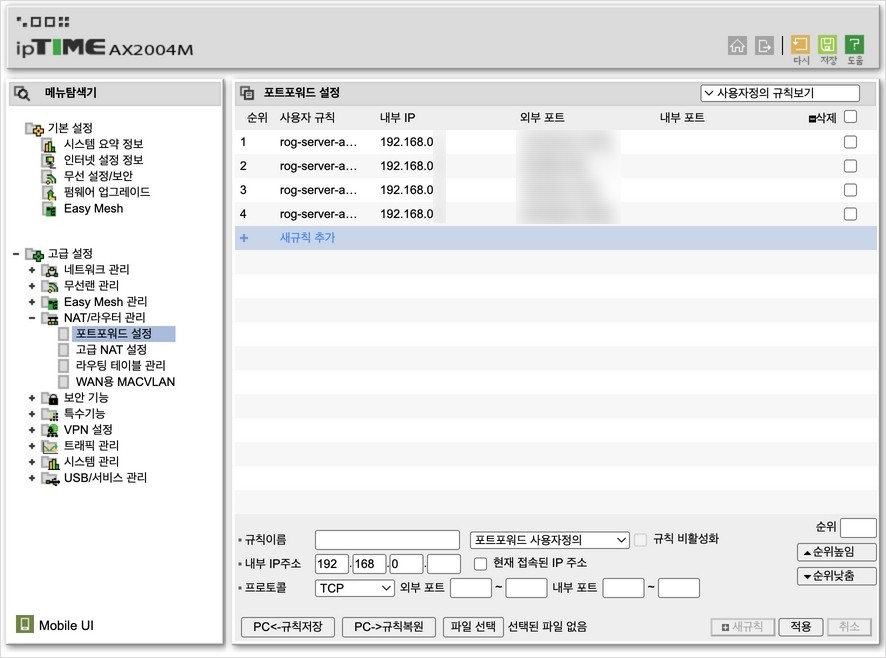
↪ The first thing I set up was port forwarding. Since I was going to use reverse proxy through Nginx Proxy Manager in the future, I didn’t have to open the ports every service. So I set it up to open only ports for SSH, HTTP, HTTPS, and DB connections.
WOL
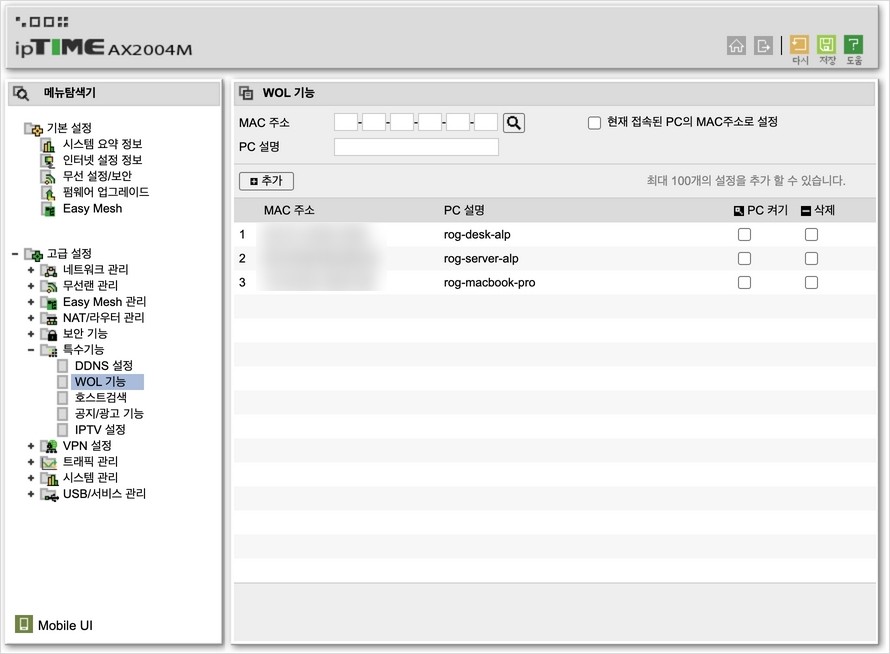
↪ While accessing the router management page, they also set the Wake On Lan function. After running a decoded game server on WSL2 in the past and seeing the WOL benefits a few times, I decided to use it once I set it up, so I registered not only the server but also other devices.
Think about turning on your PC or MacBook on your way home.
SSH

↪ The first part I set up when I started setting up the server was SSH security settings. I don’t have a specific history of security, so I’ll write down the basic and essential security settings that I got through constant Googling.
- Change SSH Port
- Firewall settings
- Block root login
- Designated User login
- public key login
- fail2ban
- Session Timeout
The above security settings are the most basic list to be set up.
SSH Port
# /etc/ssh/sshd_config
Port 9999
↪ The ssh default port is 22, and it is said that it is better to avoid well-known port 22, in order to avoid unwanted connection attempts from outside as much as possible. I also set the port forwarding to the number that I had in mind, and now the server has changed the setting value.
Firewalls
# iptables Chain
$ sudo iptables -L --line-numbers
↪ Based on Ubuntu 22.10, there were no restrictions on the firewall default settings that I looked up with iptables. In my case, all ports were closed except for the ports specified on the router, so I didn’t set up a firewall.
root login disable
# /etc/ssh/sshd_config
PermitRootLogin no
↪ The default value is ‘prohibit-password’. I set it to ‘no’ because I plan to block the root login remotely.
Designated User login
# /etc/ssh/sshd_config
AllowUsers use1,user2,user3
↪ In my case, I only created one user because it’s a private home server. Write down the username to allow ssh login.
fail2ban
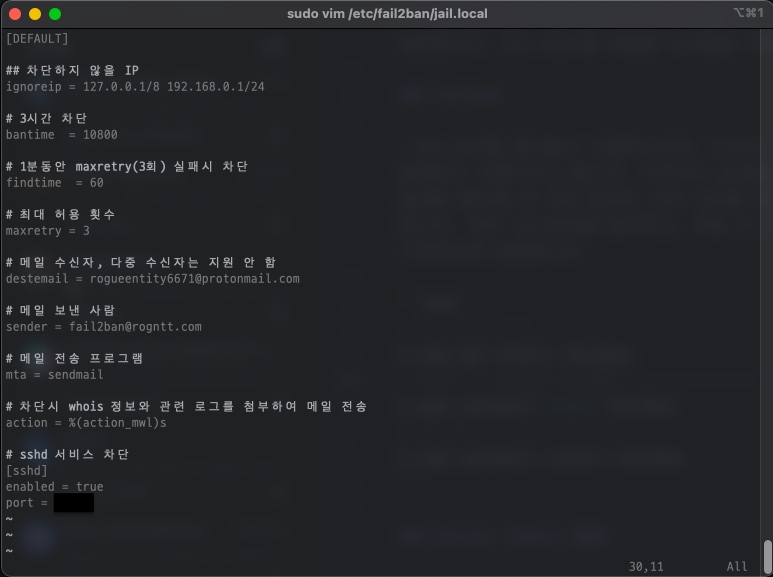
↪ It is said that if you use the SSH port with it open, a Brute Force attack is bound to occur. I’ve never been nervous about an actual connection attempt so far, but I’m going to take action in advance. First, install fail2ban and set it to start automatically when booting up.
If personalization is required, the settings are specified in the setting file at the following location, and the fail2ban service is restarted and applied.
# fail2ban install
$ sudo apt install fail2ban
$ sudo systemctl enable fail2ban
# personalize fail2ban
$ sudo vim /etc/fail2ban/jail.local
$ sudo systemctl restart fail2ban
You can use fail2ban with the following commands.
# check status
$ fail2ban-client status
# fail2ban log
$ sudo tail -f /var/log/fail2ban.log
# auth log
$ sudo tail -f /var/log/auth.log
# disable banned ip
$ sudo fail2ban-client set sshd unbanip 111.222.333.444
Session Timeout
$ vim ~/.zshrc
$ source ~/.zshrc
# Session Timeout
export TMOUT=1800
↪ Since I use zsh, I set the session timeout with the zshrc file. If you use bash, you can set the settings in bashrc.
public key login
# ed25519
$ ssh-keygen -t ed25519
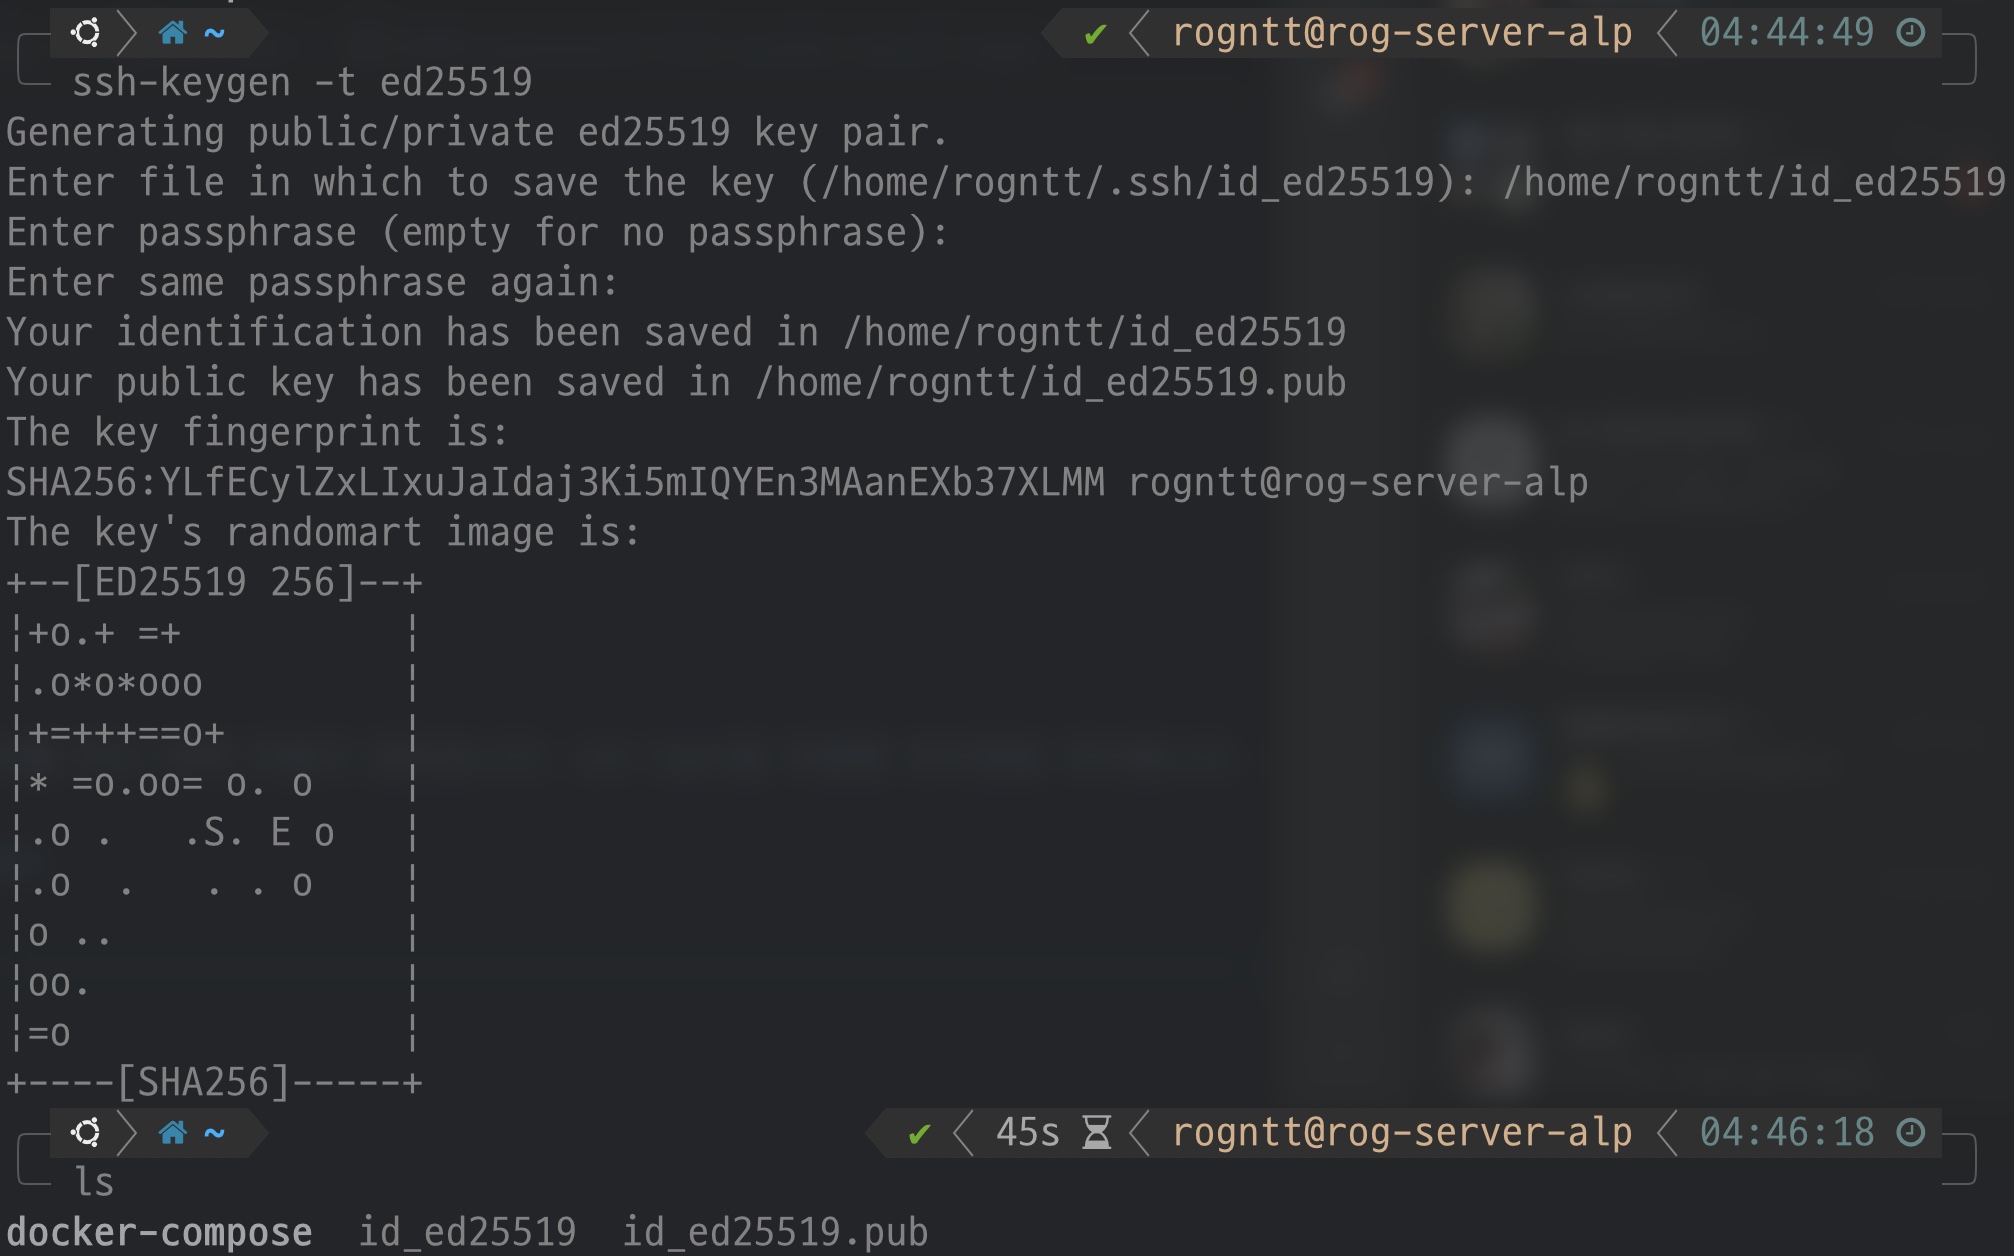
↪ When you attempt to generate a key pair through ‘ssh-keygen’, you will be asked the following items.
- Path to create a key and save it as a file
- passphrase
- Check the entered passphrase
After these, a key pair is created as a file in the path you specify, and the public key must be stored on the server and the authentication key must be stored privately. You must now place the public key in the appropriate path for authentication.
# input public key here
$ sudo vim ~/.ssh/authorized_keys
# or
$ cat id_ed25519.pub >> ~/.ssh/authorized_keys
Now, you must change the settings to make it impossible to log in the password to the server’s ssh.
# /etc/ssh/sshd_config
PasswordAuthentication no
This is it! SSH security setup that I carried out while building a personal server!
I hope to roll the server well without any problems.

댓글남기기